Stick It In Your KAN®
How to Germinate seeds in the KAN®.
Visit our YouTube channel and learn why and how the KAN® is designed and used from the creator, Don. Follow along as he walks you through, step-by-step how to use the Cannakan® system.

Give em' what they need
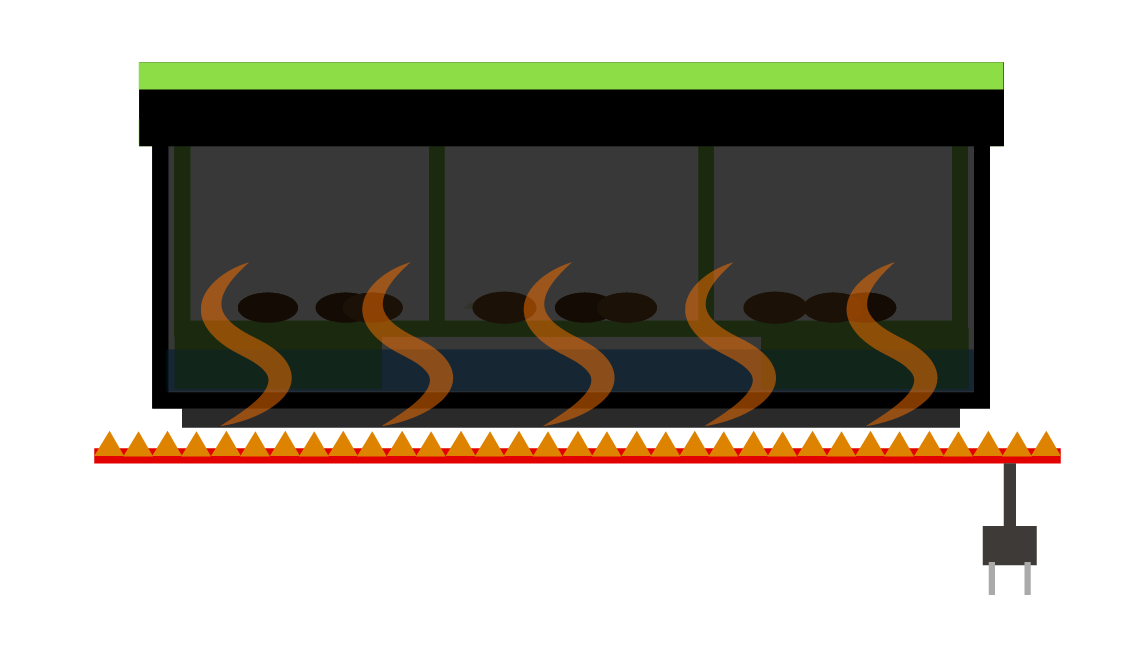
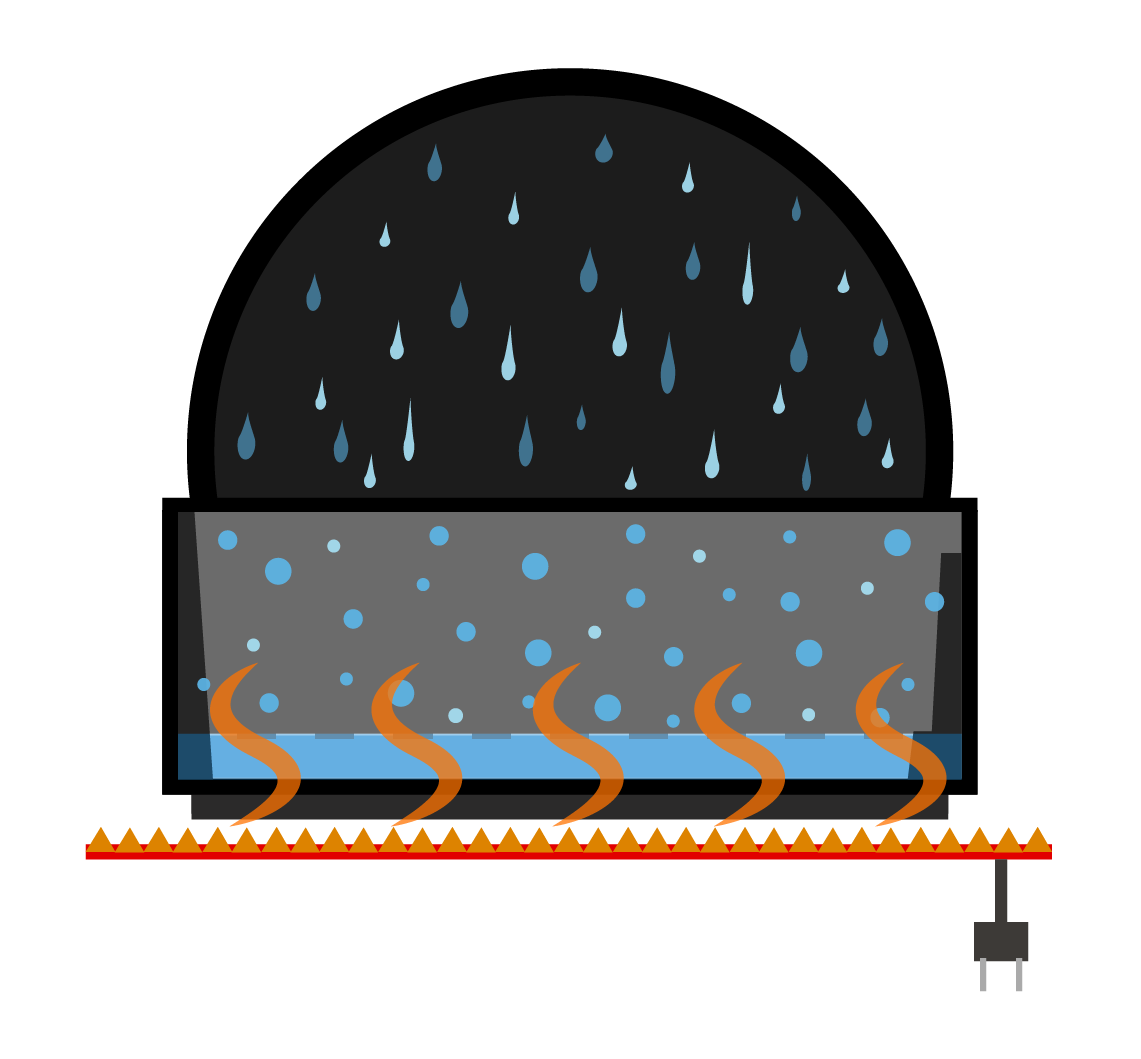
Create a Convection for a Textbook Environment.
The Cannakan™ systems were designed to create a convection during the germination & early growth process.
For best results: We recommend using our KANWARM germination heat pad with FAR infrared technology.
BEFORE YOU BEGIN. ADD A FILTER PAPER.

Step 1
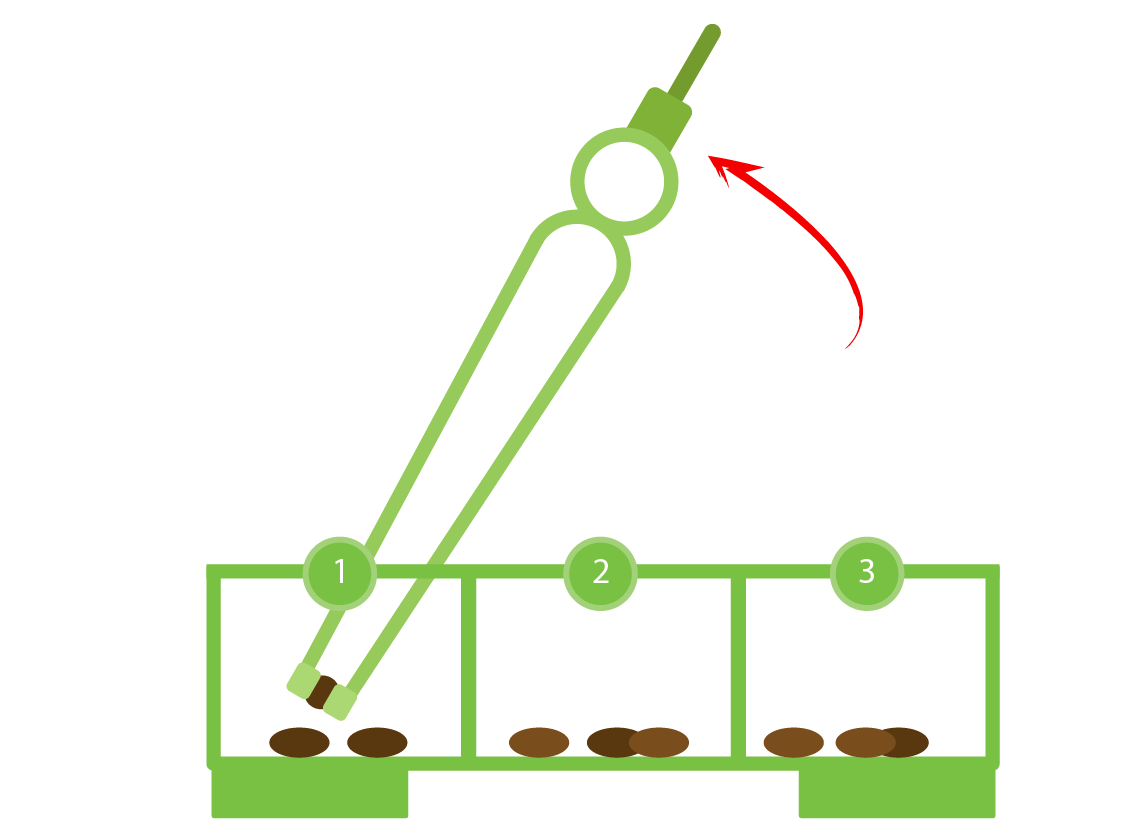
A.
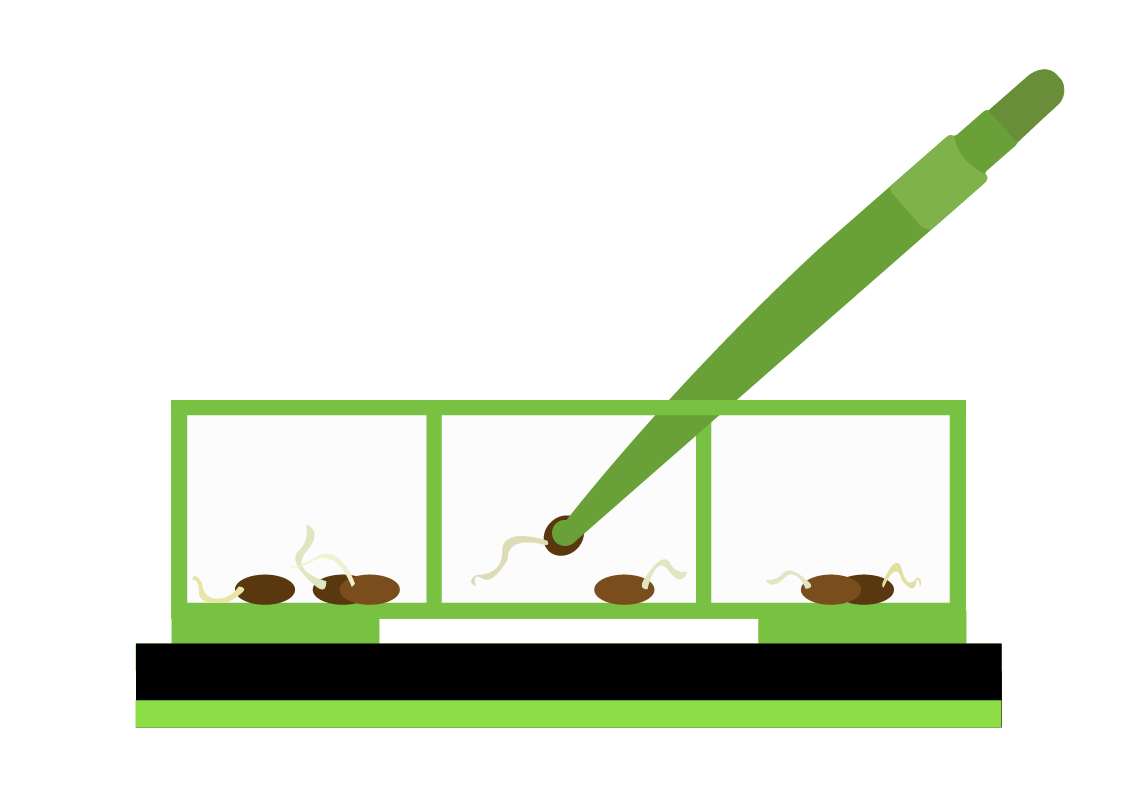
- Place seeds in the partitioned strainer using the HUGGERS® cupped seed tweezers.
- Record your seed placement onto your partition chart by referencing the partition number indicator.

B.
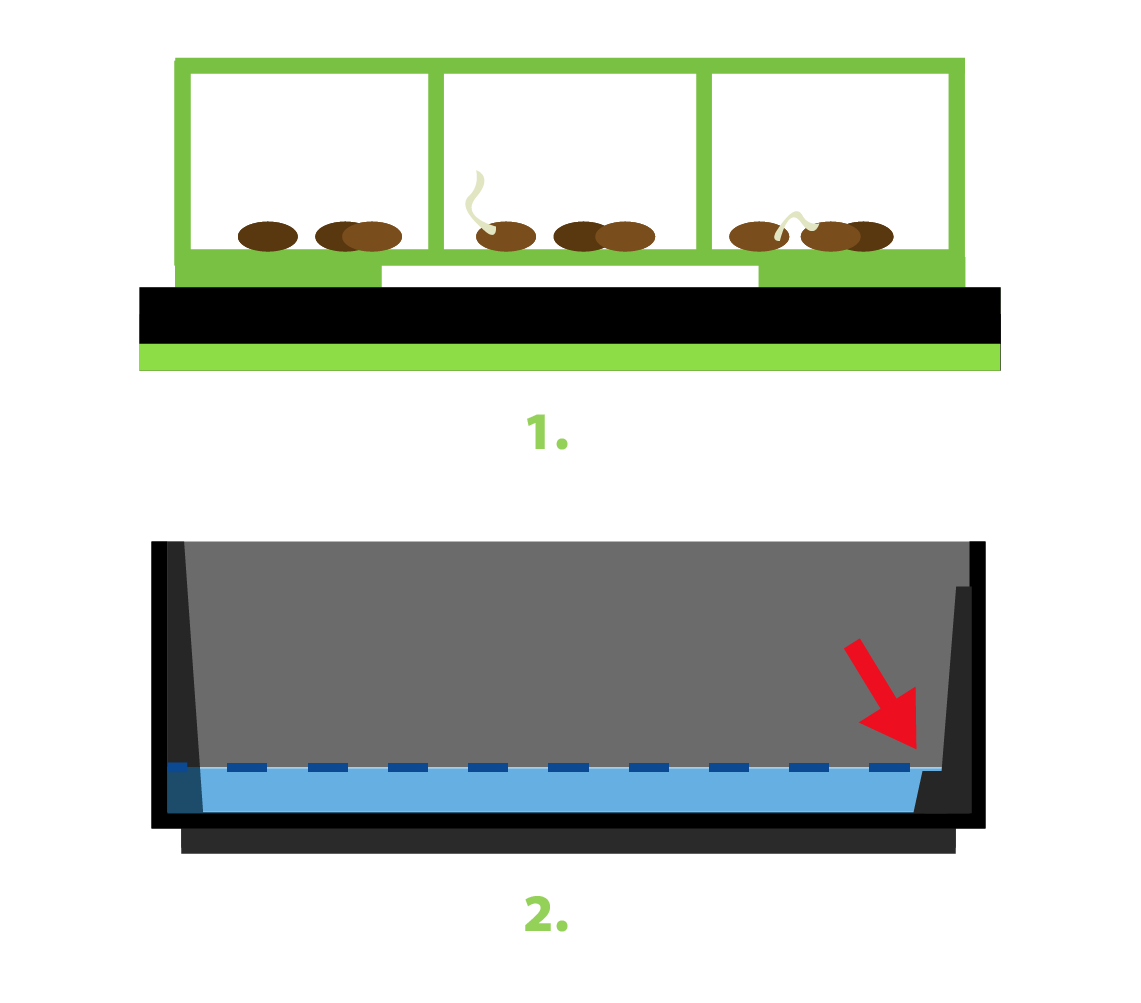
- Fill the KAN® canister to the “max fill indicator” with water. Avoid overfilling. (distilled water-recommended: Safe, widely available & consistent.)
Fill amount: 150 mL max
Optional: add 1-3% hydrogen peroxide
to water.
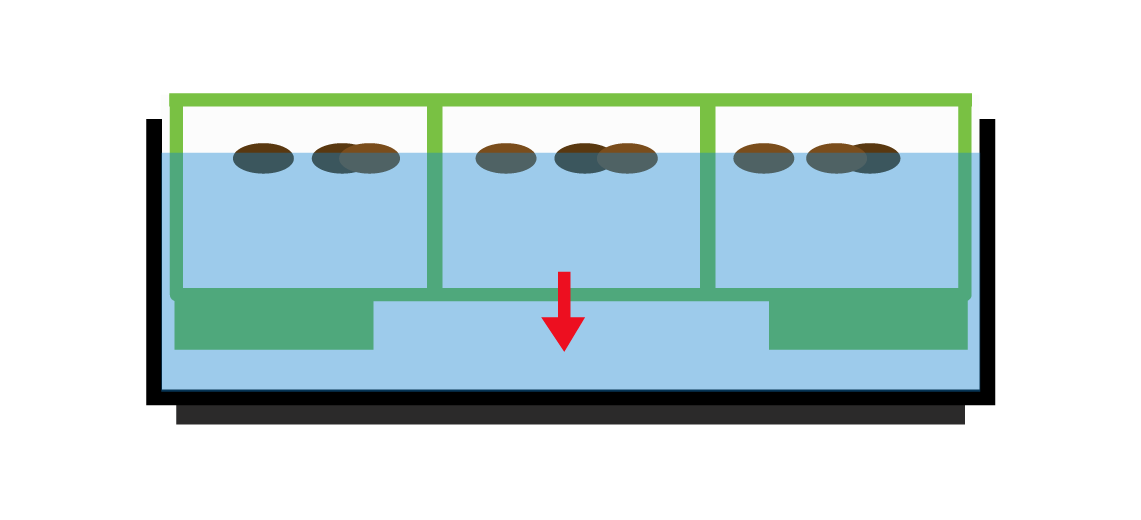
C.
- Place inner strainer with partitioned seeds into the outer canister allowing the strainer to float and self-sink. The seeds will float and begin to absorb water and rehydrate.
D.
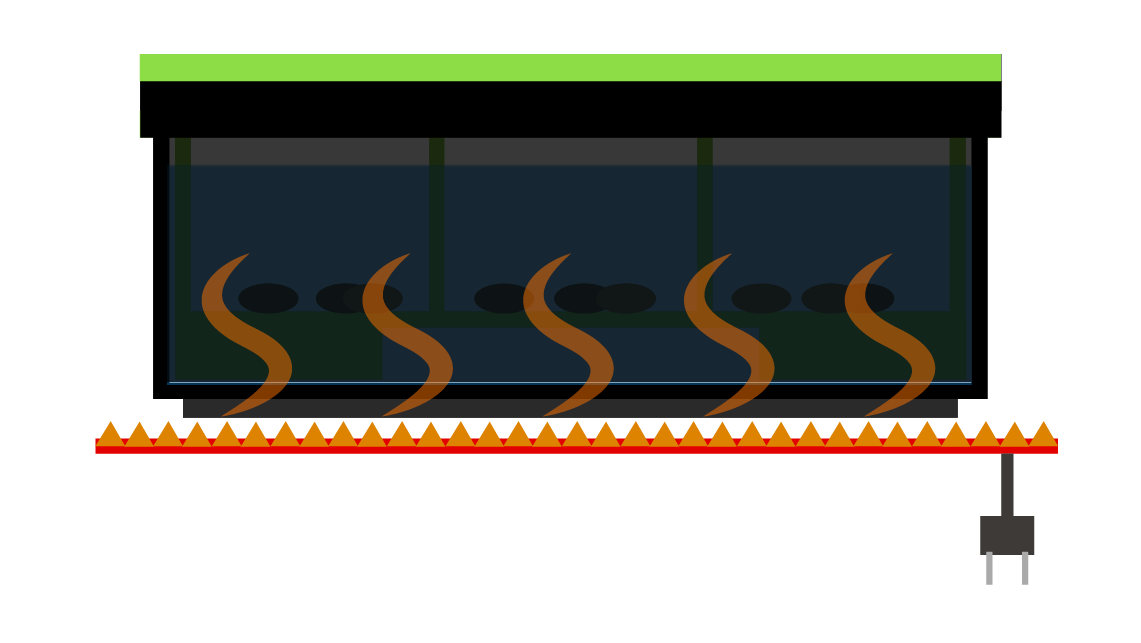
- Close the lid on the canister to retain the heat & humidity and block out light.
- Place the closed canister on a heat pad for no more than: 16 - 24 hours. Temperature examples to follow:
- Seed Target Temperature: 75°- 85°F (24°- 29°C)
- Heat Pad Temperature setting: 85°- 95°F
- Research your seeds' ideal germination temperature before you start the germination process. *It is not recommended to exceed 24 hours when soaking seeds.
Example: Seeds that require 85°F -> Set heat pad to 95°F. ◉
Set Heat Pad +10°F warmer than target temperature. ◉
Example: Seeds that require 85°F -> Set heat pad to 95°F. ◉
Set Heat Pad +10°F warmer than target temperature. ◉
Example: Seeds that require 85°F -> Set heat pad to 95°F. ◉
Set Heat Pad +10°F warmer than target temperature. ◉
Example: Seeds that require 85°F -> Set heat pad to 95°F. ◉
Set Heat Pad +10°F warmer than target temperature. ◉
Example: Seeds that require 85°F -> Set heat pad to 95°F. ◉
Set Heat Pad +10°F warmer than target temperature. ◉
Example: Seeds that require 85°F -> Set heat pad to 95°F. ◉
Set Heat Pad +10°F warmer than target temperature. ◉
Example: Seeds that require 85°F -> Set heat pad to 95°F. ◉
Set Heat Pad +10°F warmer than target temperature. ◉
Example: Seeds that require 85°F -> Set heat pad to 95°F. ◉
Set Heat Pad +10°F warmer than target temperature. ◉
Example: Seeds that require 85°F -> Set heat pad to 95°F. ◉
Set Heat Pad +10°F warmer than target temperature. ◉
Example: Seeds that require 85°F -> Set heat pad to 95°F. ◉
Set Heat Pad +10°F warmer than target temperature. ◉
Example: Seeds that require 85°F -> Set heat pad to 95°F. ◉
Set Heat Pad +10°F warmer than target temperature. ◉
Step 2
A.
Uncover and lightly tap any remaining floating seeds with either end of the HUGGERS® cupped seed tweezers so that the seeds sink and settle at the bottom of the strainer. Seeds will sink indicating they are both, viable and have absorbed enough water to begin germinating. Leaving seeds in the water for more than the recommended 16 - 24 hours could result in a lack of oxygen and cause the seeds to suffocate or “drown”.
*Don't discard or give up on seeds that don't sink, unless you have specific concerns.
Step 2
Section B
- 1 B. Open & remove the lid. Place upside-down on your workspace. Remove the inner strainer with partitioned seeds and place into the KAN®'s lid to collect any excess of draining water from the strainer.
*Examine your seeds at this time.
- 2 B. With the inner partition(s) / strainers out. Discard existing water from the outer canister body. Refill with fresh distilled water only filling to the “Minimum fill” indicator, highlighted in the image with the red arrow. (25 mL max)
Distilled water is recommended. Safe, widely available & consistent.
*Optional: add 1-3% hydrogen peroxide to water.
NOTE:
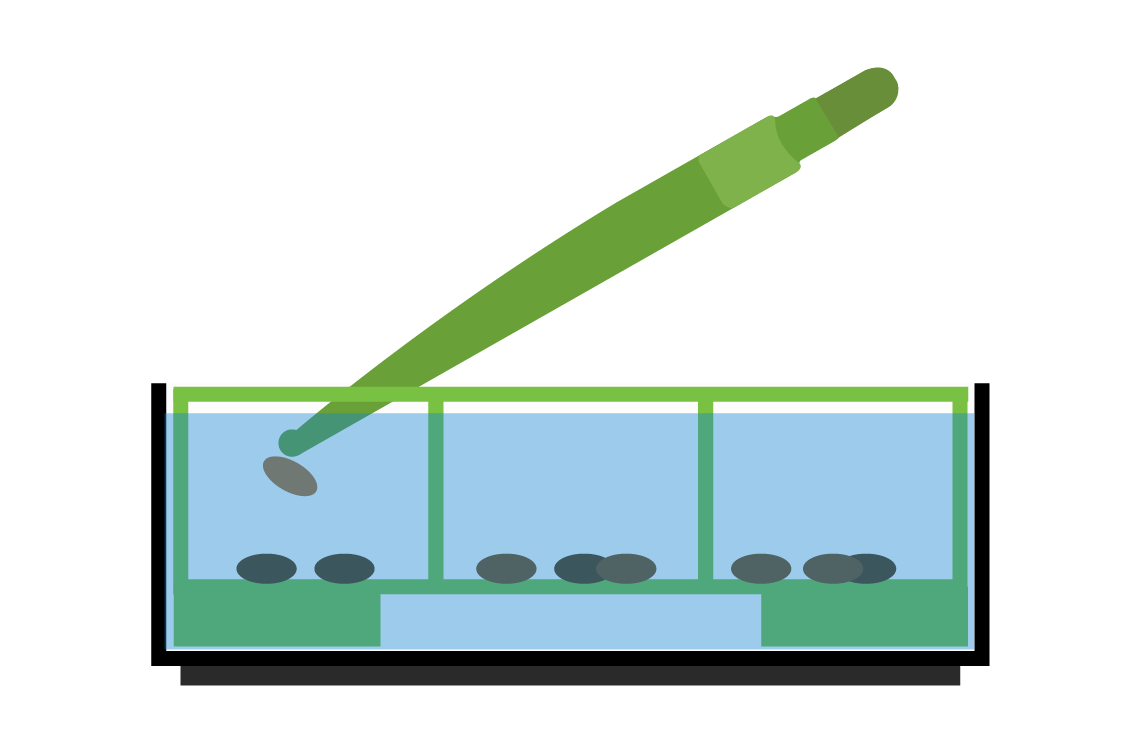
Check your seeds
You may have seeds that have already begun to germinate. Remove and plant any seeds with minimum radicle (taproot) length: 1/4” to 1/2” (1,27cm - 1,9cm) using the HUGGERS® cupped seed tweezers.
C.
Place inner strainer with partitioned seeds back into the KAN® canister body.
NOTE: When germinating seeds, the water level should be just below the underside of the strainer. Do not fill above the "minimum fill" indicator. (circled in picture) Leave a small air gap between the strainer and the water surface. If water is coming through and entering the strainer, remove some water. (Minimum fill: 25 mil max)
D.
Cover and return to heat pad: Close the lid on the KAN® canister to block out light and keep in heat and humidity. Return the closed canister to the heat pad. Remember to set your heat pad to +10°F warmer than your target temperature. Temperature example to follow:
- Seed Target Temperature: 75°- 85°F (24°- 29°C)
- Heat pad Temperature setting: 85°- 95°F
NOTE: You should notice condensation on the bottom side of the lid when opening within an hour or two. This is how you know the convection is working.
OVER THE NEXT FEW DAYS
REMOVE & PLANT
(Germination time is dependent on seed type & quality)
Remove & Plant Seeds with a Radicle (taproot) with a minimum length of: 1/4” - 1/2”+ (1,27cm - 1,9cm)
E.
HUGGERS®
E. 1. Use the dibber end of the tweezers to create a home in your grow medium before handling.
E.2. Use your HUGGERS® cupped seed tweezers, avoiding the radicle (taproot). Learn more about using the HUGGERS® by selecting the button below.
Always check
During Germination
- Make sure that you have water covering the inside of the bottom of the canister during the germination stage.
- The heat pad is plugged in & working.
- You have signs of humidity / condensation on the underside of the lid each time it is opened.
NOTE:
Our heat pads are extremely accurate and difficult to test at lower temperatures by touch. To test heat pad: Max heat pad to 122°F.